Friday, October 25, 2013

Caramel Crusted White Grape Pie

After reading the title to this post, you may be asking yourself what exactly a grape pie looks like... 

This... It looks like this.

Alright... Here's a test. in ten seconds, can you name three recipes that call directly for grapes (excluding jam etc.)? If you can, please leave them in a comment on this post - because aside from one salad, I've got nothing.  This recipe comes directly from the one and only Alton Brown, who was reportedly contracted to be a speaker at a fair, and the food theme he had to work with was grapes. He realized that there are hardly any recipes that call for grapes, and came up with this. 

Unsurprisingly, the heart and soul of this dish is, well, grapes. One pound of grapes, but it is not just grapes... The night before you plan on demolishing this particular dish, take your pound of grapes, wash and cut them each in half, then add in some honey, lime juice, and brandy. Throw all that business in a zip top bag, and throw it in the fridge. We'll reconvene in the morning. 

In the near future...

  The next day, drain the grapes from the liquid in a colander, and get to making a crust... 

Graham crackers are for amateurs... We're making grape pie here!
How do we make a graham cracker style crust even awesomer? Vanilla wafers of course... Grab 40 (not 2 cups, not about 7 ounces, 40. Yes I expect you to count them.) wafers and get to crumb-ifying them. If you have a fancy food processor, that's what I'd recommend using. I personally took the zip top bag and rolling pin to hulk smash the wafers to powder. While you're brutalizing the tasty vanilla goodness, throw 6 tablespoons of butter in a bowl and microwave it until it's melted. If your microwave is powered by a small nuclear reactor like mine is, it'll only take about 45 seconds. 

Since you're already pounding (or processing) things to tiny bits, go ahead and crush about 4 ounces of walnuts and add that to the wafer crumbs. If you're using a processor you can just throw 'em in there and give them a pulse or four until they are blended well with the vanilla wafer crumbs. 

Once you've got the wafers and walnuts processed and mixed together, add in a quarter teaspoon of salt, and the melted butter. the finished product should look like this:

It should kinda resemble wet sand.

 Now that the hard part is done, you can press this crust mixture into an 11x7 inch glass baking dish.

Lookin' good

Next, in a medium mixing bowl, whisk together one 16 ounce tub of sour cream, 1/2 cup of brown sugar (tightly packed), and a tablespoon of vanilla extract. Mix until there are no clumps of sugar, and everything appears to be evenly distributed. At this point, fold in the drained grapes. Once it's all mixed up, dump the filling on to the crust.

Almost there... 

Then spread it as evenly as you can manage to.

Like a boss.

Now for the sugary napalm (a.k.a. caramel) blend that we will be dropping on top of this thing.

In a medium sauce pan over medium-high heat, mix together 3/4 cup of brown sugar (tightly packed) and 6 more tablespoons of butter. When it's thoroughly mixed and at a decent boil, set a timer for a minute. Let it boil for a minute before removing the pan from the heat.

Don't worry if it looks a bit grainy, it's supposed to. 

Once the caramel mix is cooked, pour the bubbling mixture out on to the top of the pie.

Now we're getting somewhere. 

Try to evenly distribute the caramel over the top of the pie. If you leave some gaps, you can tilt the pan slightly to try and get it to go where you need it.

Or you can take your time, and be precise.

Once the caramel layer is on the top, sprinkle on some salt, and don't hesitate to be generous.


Resist the urge to dig in now... 

Once it's all done, cover the pie with aluminum foil or plastic wrap, and transfer to the fridge for it to set up. Try your best to give it about two hours in there... It'll be worth the wait!

To serve, cut into squares with your spatula. Don't hesitate to kinda stab at it - that caramel is crunchy.


Here's the full recipe!
Adapted from Alton Brown's recipe here

1 pound     White Seedless Grapes
1/2 cup      Honey
2 Tbsp       Brandy
2 Tbsp       Lime Juice (fresh)
40             Vanilla Wafers
4 ounces    Chopped Roasted Walnuts
1/4 tsp       Kosher Salt
12 Tbsp     Unsalted Butter, Divided
16 ounces  Sour Cream
1 Tbsp       Vanilla Extract
1 1/4 cups  Light Brown Sugar, Divided
1/2 tsp.       Coarse Ground Sea Salt, or Maldon Salt


  1. Rinse, drain, dry, and halve the grapes
  2. Place dried grapes in zip top bag with honey, brandy, and lime juice. 
  3. Let grapes soak in refrigerator overnight
  4. On day two, drain the grapes and let them sit in a strainer or colander while the next steps are completed
  5. Break down the wafers to crumbs
  6. Chop or process the walnuts (coarse grind) 
  7. Melt 6 tablespoons of butter in a microwave safe dish 
  8. Mix kosher salt, wafer crumbs, walnut pieces, and butter until it all has the consistency of wet sand
  9. Pack the crust into an 11x7 baking dish
  10. Mix the sour cream, vanilla, and1/2 cup of brown sugar thoroughly in a mixing bowl
  11. Fold the drained grapes in to the sour cream mixture 
  12. Pour filling on to the pressed crust
  13. In a medium sauce pan, melt remaining 6 tablespoons of butter and 3/4 cup of brown sugar over medium heat. 
  14. When the mixture comes to a boil, time one minute. 
  15. After the caramel has boiled for a minute, pour it directly and evenly on to the top of the pie filling 
  16. Immediately sprinkle caramel layer with coarse sea salt or Maldon salt
  17. Cover pie and move to refrigerator for approximately 2 hours, until the filling and caramel are set. 


Yield: 1 pie, serves 8-10

Inactive prep time: 12 hours
Active prep time: 25 minutes
Cook time: 15 minutes


Wednesday, October 23, 2013

Easy French Silk Pie

Okay, so it's time to start warming up that KitchenAid again - it'll be working hard on this one.

So, I haven't been baking much lately because of some other stuff that's been keeping me busy - namely work and spending time reading up for my next certification exam. Though I haven't actually baked anything in the last week, I really wanted to make another post, so I dug through my pictures, and found a step-by-step album I made for a super-tasty chocolate dessert.

So here is the run down on what is essentially a pie crust filled with chocolate frosting - commonly referred to as French Silk Pie.

3 oz. unsweetened baking chocolate, melted
Start by putting three ounces of unsweetened baking chocolate in a microwave safe bowl and melting it down. About 50 seconds should do the trick, but your microwave mileage will vary. 

Whip it good! I'm sorry... I'll show myself out. 

Next, we will cream .375 pounds (3/4 cup, 12 tablespoons, or one and a half sticks) of butter at room temperature with a cup of regular white granulated sugar in the bowl of the mixer fitted with the paddle attachment until it is thoroughly mixed - about a minute on medium high.

After this point, drizzle in the now slightly cooled chocolate and the vanilla and mix again until the chocolate is totally incorporated. Make sure to scrape down the sides of the bowl a few times to ensure that the chocolate doesn't settle toward the bottom. 

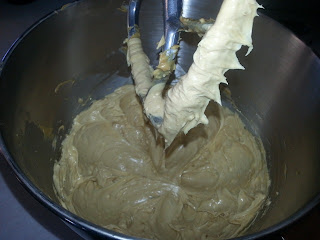
After a while, it'll look something like this:


Once it's all chocolaty, it's time to add 1 and a half teaspoons of vanilla extract, and the first of three eggs. 

Here's where the mixer's workout really starts up... Set your kitchen timer for 5 minutes. Turn on the mixer with that first egg in there and beat on about medium high (7 will do) for the FULL five minutes. After that buzzer goes off, turn off the mixer and scrape down the sides of the bowl with a rubber spatula, then add one more egg, fire up that timer and beat for another FULL five minutes. After that, repeat that process of scraping the bowl, adding an egg, and beating for 5 minutes with the third and last egg. 

That last phase is not one to be rushed. The extended mixing isn't just to get the egg thoroughly incorporated into the mixture, but rather to work a fair amount of air into the mix, which greatly affects the final product here. Having a good amount of air in the pie filling lends to the silky texture of it, adds volume, and lightens the texture a bit. I like to use the down time to tidy up around the kitchen and maybe clean a few dishes. 

Once the eggs are mixed in, you are ready to put the filling into a pie crust of your choosing. I'm not going to get in to a scratch made pie crust here (yet) and for this I really like a Graham cracker crust, but again you can use any 8-9 inch pie crust you like for this. 

Here it is in a pie crust, with the lid on, ready for the fridge. Sorry I forgot to grab pics of all stages here, but when I made this I wasn't thinking ahead to posting... I'll update with more and better pics when I make it again.


For serving, I normally leave the pie as-is until it's cut and on saucers or plates to be served. At that point I like to add a bit (of a heap) of whipped cream, and maybe some chocolate shavings if I've got 'em on hand.

After much delay, here's a pic of the final product...


Here's the full recipe!
Adapted from Jean Webster's French Silk Pie recipe

Preheat the oven to - wait, we're not using an oven!

1 nine inch pie crust, baked per instructions on package and cooled

12 Tbsp     Salted Butter, room temperature (1 1/2 sticks) 
1 cup         Granulated Sugar
3 oz           Unsweetened Chocolate, melted and slightly cooled
1 1/2 tsp    Pure Vanilla Extract
3                Large Eggs

Whipped cream, for serving
Chocolate curls, for serving

  1. In the bowl of an electric mixer fitted with the paddle attachment, cream butter and sugar until light and fluffy, about 2 minutes. 
  2. With machine running, gradually add melted chocolate and the vanilla. 
  3. Add eggs, one at a time, beating at medium speed for five minutes after each addition. 
  4. Pour filling into cooled pie crust. 
  5. Cover with plastic wrap, and transfer to the refrigerator to cool for at least 4 hours and up to overnight.
  6. Just before serving, top pie with whipped cream and chocolate curls, if using.

Yield: 1 pie - Serves 8-10


Tuesday, October 22, 2013

Peanut Butter Oatmeal Scotchies

Alright gang, what better way to get this thing started than with some cookies?

Okay, okay... easy question - the answer is clearly TWO types of cookies!!!

Well, I suppose it's more like one cookie, and a variation of it, but whatever. Let's get cookin'!


When asked if you want a cookie with or without chocolate,
the only acceptable response is "Yes."
Our journey begins, as many should and certainly will, in the bowl of my mixer.

Start with the butter (room temp please...) and peanut butter, and mix thoroughly.

Not the best moment for batter tasters to do their thing... 
From here, we add our sugars and leavening. I started with the white granulated sugar, then added (firmly packed) brown sugar. Today I used dark to bring a little more moisture into the mix. I like a softer type of cookie, one with a slight crunch but that is mostly soft once you get in to it. If you like a crunchier cookie, try changing it up and using light brown sugar. the little bit of lift in these is brought to you by twice as much baking powder as soda.

Make sure to level off your measurements.
Once the sugars and such are mixed in thoroughly, the batter will be very thick and just a little bit grainy.

A much better time than before for wandering kids, spouses,
neighbors, or other batter thieves to take a sample.

Add the eggs and as much vanilla as you see fit. I should clarify here that my awesome cook of a mom raised me to be a bit of an estimator in the kitchen - I'll do my best to kick that habit for the sake of publishing the exact recipe you need to make the tasty food I'll be posting in here, but when I eyeball something, I will at least let you know!  That being said - I normally go for a little over a teaspoon. We'll call it 1 1/2 teaspoons or 1/2 tablespoon.

The only way to lose, is not to play... 

Now we've reached the fork in the road. On one side we have a great butterscotch cookie, on the other side, we have a great chocolate butterscotch cookie. There is really no way to lose this game, but I would encourage even the die-hard chocolate lovers out there to try the recipe sans-chocolate - I promise it is delicious either way.

I used a digital kitchen scale to divide the batter dough batter evenly by weight.

I continued along the plain route first because I didn't want chocolate in the bowl of my mixer while trying to make the plain version last - this way  I can make 2 versions of the cookie without cleaning the bowl of the mixer between batches.

The next steps are very straight forward...

Gradually mix in the flour, then add the oats and chips of your choosing

For the chocolaty goodness version - before the flour mix in melted (then slightly cooled) unsweetened chocolate.

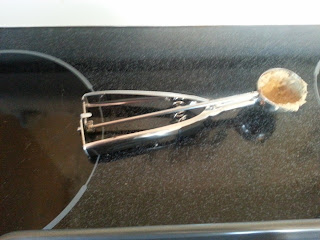
Next, use your trusty disher (you do have a disher, right?)

 Also referred to as a cookie scoop, ice cream scoop,
 server, and probably a bunch of other things...

I used one that was about 1.5 tablespoons in volume, to scoop out equally sized cookies onto a silicone lined cookie sheet. If you don't have a silicone pan liner, you can use a regular ungreased cookie sheet.

The spice of life.

Bake at 375** for approximately 8-9 minutes. until the cookies are slightly browned on the outside and a little soft in the middle.

Or until your kids, pets, or significant other come poking
 around wondering what smells so good.

As always, remove the cookies from the oven and let them cool for a couple minutes on the pan before removing them to a cooling rack.

Where to start?

Please leave a comment! I'd love to hear from you!

Here's the full recipe!
Adapted from the Better Homes and Gardens New Cookbook 75th Anniversary Edition

Heat your oven to 375 degrees Fahrenheit.**

3/4 cup       Butter, Salted (one and one half sticks) at room temperature
1/2 cup       Peanut Butter, Creamy
1 cup          Granulated White Sugar
1/2 cup       Brown Sugar, Dark, Firmly Packed
1 tsp           Baking Powder
1/2 tsp        Baking Soda
2 eggs         Large
1 tsp           Vanilla Extract, Pure
1 1/4 cups   Flour, All Purpose***
2 cups         Rolled Quick Oats***
1 cup          Butterscotch Chips (chocolate or chocolate and peanut butter also work well)***

Optional - unsweetened chocolate. 3 oz. for whole batch, 1.5 oz. for half batch, as pictured.


  1. Start by thoroughly mixing the butter and peanut butter together in the bowl of an electric mixer. Scrape the sides of the bowl as needed
  2. Add in the sugars, baking powder and baking soda. Mix thoroughly.
  3. Mix in the eggs and vanilla
  4. If making a chocolate batch, divide batter (if desired) and add in chocolate at this point
  5. Gradually mix in flour until fully incorporated***
  6. Mix in oats and butterscotch until evenly dispersed***
  7. Place on cookie sheet spaced 2 1/4'' apart
  8. Bake 8-9 minutes until edges are just browned - centers will still be soft when the cookies are done.
  9. Remove from oven, and allow to cool on pan for 2-3 minutes before removing to cooling rack to cool completely.
Yield: approximately 4 dozen cookies


**For the sake of your taste buds and your unborn cookies, use an oven thermometer. When the preheat alarm tolls I found my brand new (well, 9 month old) oven to be off by about 8 degrees at this temperature. It was off by a lot more at higher temperatures. A decent model oven thermometer can be had for ten dollars or less at almost any grocery store.

***If doing a split batch use:
     1/2 cup plus 2 tablespoons of flour in each batch
     1 cup oats in each batch
     1/2 cup chips in each batch (remember, a few extra chips never hurt anyone)

Glazed Chocolate Peanut Butter Bars

I promise that one of these days I'll post a recipe with some variety of nutritional substance, but alas - here is another desert brought to you by peanut butter.

Glass of milk NOT optional. 

This recipe starts off much like that of the Peanut Butter Oatmeal Scotchies I posted earlier this week, but after a few modifications to the recipe it gets pressed into a jelly roll pan and baked up as bars... Then covered with chocolate, then covered with a delicious peanut butter glaze.+

Note: This post brought to you with the help of my assistant, Dexter.

Typing is tricky... It's nice to have the help. 


Start in the bowl of an electric mixer with the softened butter and peanut butter. Mix the butters together thoroughly.


Once the peanut butter is combined with the regular butter, add in the sugar and the brown sugar and mix until everything comes together and looks something like this.

We have officially moved to the part of this recipe where
things taste good when sampled.

At this point, you're ready for eggs and vanilla. Add them to the bowl and mix on medium speed for about 20 seconds, until just incorporated then add the flour, salt, baking soda, and the oats and mix until a stiff dough is formed. 

Gently press the dough into a lightly greased 12x17 jelly roll pan. Try to build up a little mound around the edges kind of like a pizza crust. make sure the dough is evenly dispersed - it's really easy to leave thin spots.


Place the cookie crust in the oven at 350 degrees for about 20 minutes, While it's in the oven, make sure you have a good work area that is big enough to handle that 12x17 hot pan. We have a few quick steps to tend to after the sheet is baked.

Ready to melt some chips
As soon as the cookie crust is baked and a nice golden brown color, remove it from the oven and place it on a hot pad, stove top, or other heat resistant surface. We will have to move quick for the next step!

Next, take an entire 11-12 ounce bag of chocolate chips (or butterscotch, or as I did, peanut butter chocolate chips) and spread them evenly over the top of the hot cookie crust. 


Let them sit on there for a few minutes to let them melt, then spread them evenly over the surface of the crust with a icing spatula. I used a 4'' angled frosting spatula, but you could use a regular silicone spatula or whatever you have on hand.

Ready to chill for a bit.
Once the chips are melted and spread on the crust, move the whole operation to the fridge to set. Make sure you allow time for the pan to cool before placing it in the fridge - you don't want to melt any shelves in there. Leave it in the fridge for about 30 minutes or until the chocolate layer on top is well set.

While the bars are cooling in the fridge, go back to the mixer, and get ready to make the glaze. This has only three ingredients - confectioner's (powdered) sugar, milk, and peanut butter. Also, this is one of those things that is hard to accurately convey in a recipe. play with the amounts until the consistency is right. A good place to start is with the amounts I put in the recipe - 2 cups confectioner's sugar, and 1/4 cup each of peanut butter and milk.

All you need to do is throw it all into a clean mixer bowl with the whisk attachment and blend it all together.Make sure to start on a very low speed and use a pour shield if you have one to avoid a sugary mushroom cloud erupting from the bowl.

The target consistency.
If the glaze comes together too thick - sort of like a frosting - add a splash of milk and blend it in, repeating as necessary to thin out the glaze. If it is too thin, add more confectioner's sugar about a teaspoon at a time, mixing thoroughly after each addition. You want the glaze to be thin enough to run freely off of the whip but thick enough that it doesn't disappear into the bowl as it lands. You should be able to see that little trail like in the picture above. 


Dump the glaze into the center of the crust, and spread out evenly

Before
After
Once the glaze is spread out nice and evenly on the bars, it's back to the fridge for that glaze to set. Leave it in for about an hour this time. 

After 60 minutes in the fridge...
After 61 minutes...


Here's the full recipe!

Heat the oven to 350 degrees**

Crust:


1 cup       Butter, Softened
2/3 cup    Peanut Butter, Smooth
1 cup       Sugar
1 cup       Brown sugar, Packed
1-1/2 tsp Vanilla Extract, Pure
2 eggs     Large
2 cups     Flour, All Purpose
1 tsp       Baking Soda
1/2 tsp    Salt
1 cup      Oats, Regular rolled or instant 

1 11-12 oz package chocolate chips (any variety you like)

Glaze:
2 cups   Confectioner's Sugar
1/4 cup  Peanut Butter, Smooth
1/4 cup  Milk

Instructions:


  1. Mix the butters together in an electric mixer.
  2. Blend in the white and brown sugars.
  3. Add in eggs and vanilla, mix thoroughly.
  4. Add in flour, salt, and baking soda, mix.
  5. Add in oats, mix.
  6. Spread onto a lightly greased 12x17 jelly roll pan (a cookie sheet with sides)
  7. Bake for 20 minutes at 350 or until dough is firm and golden brown
  8. Remove crust from oven and promptly sprinkle with chocolate chips
  9. Allow the heat of the crust to melt the chips for about 4 minutes 
  10. Spread the melted chocolate evenly over the crust, then refrigerate for 30 minutes
  11. While chocolate is cooling in the refrigerator, make the glaze by mixing the confectioner's sugar, peanut butter, and milk together in a electric mixer fitted with the whip attachment.
  12. Adjust glaze to proper consistency as needed by adding milk to thin it or confectioner's sugar to thicken it.
  13. Once first chocolate layer is cooled, spread glaze evenly over the top of the chocolate layer.
  14. Refrigerate once more until the glaze sets. 
  15. Cut in to bars.
Yield: approximately 50 2'' x 2'' bars


**For the sake of your taste buds and your unborn baked goods, use an oven thermometer. When the preheat alarm tolls I found my brand new (well, 9 month old) oven to be off by about 8 degrees at this temperature. It was off by a lot more at higher temperatures. A decent model oven thermometer can be had for ten dollars or less at almost any grocery store.

Three Bean Chili With Beef

Alright, alright...

I said in my post with the tasty Glazed Peanut Butter Bars that one of these days I was going to put something that wasn't a desert of some variety on here. I think my exact words were "a recipe with some variety of nutritional substance" and well, here it is.

The finished product, with cheddar dutch oven bread.


It's starting to get a bit chilly here in Milwaukee. We had our first freeze last night, so what better recipe to post than a thick, hearty, spicy chili?


That, my hungry friends, is a bowl of my three bean chili. It is about as basic as you can get with chili, but any great dish starts with the basics.


For this recipe, I start by browning three pounds of ground beef in a 6 quart dutch oven. For this round, I used 85% lean, but you could go as lean as you'd like. As soon as it hits the pan, add in one half of a very large, uniformly diced white onion. The onion I used in this batch was every bit as large as a softball - and then some. 

Once the beef is browned, throw in the other half of the onion and about a tablespoon and a half of minced garlic. and mix it all in.


Next, strain and rinse the beans. One can each of pintos, black, and dark red kidney beans. 


Add the beans to the dutch oven, along with 2 cups of beef stock, a 14 oz. can of tomato sauce, a quarter cup of cornmeal, three tablespoons of chili powder, and salt and pepper to taste. Stir to combine, cover and let simmer for a couple hours, stirring occasionally. If you must have a number, 2 hours normally does nicely. Keep the heat low to avoid scorching, and give it a stir every 20-30 minutes. 

I'd like to take this opportunity to mention to anyone who's interested, that I buy my spices exclusively at The Spice House on Old World 3rd street in Milwaukee. No, they do not pay me to say that. The chili powder in this recipe is their medium chili powder, and it's the best I've ever had... Anywhere. 


Serve in a bowl with your favorite toppings, and a good hearty bread. 


One last quick note - this chili, even with its three tablespoons of chili powder leans pretty far toward the mild side of the spectrum. If you like it a little hotter, add more chili powder - cayenne or ancho would work very well. My wife Mel discovered that a few splashes of the chipotle Tabasco sauce add a great flavor and the perfect amount of heat to this dish. 

Enjoy!

Here's the full recipe!

3 lbs. ground beef
1 large onion, diced
1 14 oz. can tomato sauce
2 cups beef stock
1 can pinto beans, drained and rinsed
1 can black beans, drained and rinsed
1 can dark red kidney beans, drained and rinsed
3 tablespoons chili powder
1/4 cup cornmeal
salt and pepper to taste
sour cream (optional)
shredded cheese (optional)
chopped scallions (optional)

Instructions:
  1. Brown the beef over medium heat with one half of the onion.
  2. Add in the second half of the onion, and the garlic.
  3. Drain and rinse the beans, and add them to the beef in the pan.
  4. Add in the beef stock, tomato sauce, and spices, stir to combine.
  5. Let simmer for two to three hours.
  6. Serve with toppings of your choice.