Allow me to make it up to you with tales of pizza excellence.

So, I found a recipe for a stupid simple pan style pizza recipe on seriouseats.com and decided to try it out. This is not an ideal same-day pizza recipe. It does best when the dough is allowed a day to rise - though if you get the dough going in the morning it can work out just fine for a same day dinner.
The coolest thing about this recipe is that even though the dough for the crust is from scratch, you can let the stand mixer sit this one out. This dough requires exactly zero minutes if kneading. Just weigh (yes, "weigh" - as in with a scale) out the ingredients into a bowl. Mix to combine, and walk away for at least 8 hours. I like to let mine go overnight because the dough develops more of a yeasty flavor the longer it is allowed to rise, and I really enjoy that in a pizza.
Once the dough has risen for a day, remove it from the bowl and plop a pizza'a worth of dough down into a well-oiled cast iron skillet. Any heavy, dark, oven proof pan will work, but non-enameled cast iron is best. Once the dough hits the pan, set a timer for two hours. After that, it's toppings then on to the hot oven for about 15 minutes before being devoured in about 5 minutes.
The crust for this thing is simple... I mean stupid simple.
I had my buddy time me for grins and giggles last time I made one of these, and getting the crust together took under 4 minutes. That wasn't a race. I wasn't rushing. I was taking my time and measuring carefully. it is that simple.
Start by throwing an empty bowl on your kitchen scale and taring it. That is, make it so the scale says "0" when the empty bowl is on it, and set the display unit to grams.
Scoop bread flour into the bowl until the screen says 200g, then tare again, so the reading zeroes out.
Next add a few large pinches of kosher salt until the reading says "5g" and tare again.
Up next, throw in a couple small pinches of instant dry yeast (such as SAF instant yeast) until there are 2g of yeast in the bowl.
Next, the wet ingredients.
Following the same procedure as the dry (measure, tare, measure, tare) add in 4 grams of good extra virgin olive oil, followed by about 140g of water.
Observant readers may notice that I just changed gears. Up until that last bit, I have been exceptionally precise - stating to the gram exactly how much of each ingredient to use. In contrast, for the water, I used the carefully formatted italic word "about". You may be wondering: "what gives?"
If that's the case, then thank you for reading carefully!
See, I can't tell you with exacting precision how much water to use because that's a moving target. One day, you may need 137g, and a week later, you could need 165g. This one is more of a "feel" type of thing. This variance occurs because flour is sensitive to atmospheric changes. If it's humid where you're at, the flour actually absorbs a small amount of water from the air, and therefore you will need slightly less for everything to come together. The opposite is true as well. Don't over think it though... Just add enough water that the dough comes together and there is no dry flour sitting around in the bowl. To be on the safe side, start with about 120g, mix thoroughly, and add water a little at a time until you run out of loose flour.
After the dough is mixed, cover the bowl tightly with plastic wrap and leave it out at room temp for 8-24 hours.
The crust for this thing is simple... I mean stupid simple.
I had my buddy time me for grins and giggles last time I made one of these, and getting the crust together took under 4 minutes. That wasn't a race. I wasn't rushing. I was taking my time and measuring carefully. it is that simple.
Start by throwing an empty bowl on your kitchen scale and taring it. That is, make it so the scale says "0" when the empty bowl is on it, and set the display unit to grams.
 |
| I don't have an interesting pic of the ingredients in the bowl.... So here's more pizza. |
Next add a few large pinches of kosher salt until the reading says "5g" and tare again.
Up next, throw in a couple small pinches of instant dry yeast (such as SAF instant yeast) until there are 2g of yeast in the bowl.
Next, the wet ingredients.
Following the same procedure as the dry (measure, tare, measure, tare) add in 4 grams of good extra virgin olive oil, followed by about 140g of water.
Observant readers may notice that I just changed gears. Up until that last bit, I have been exceptionally precise - stating to the gram exactly how much of each ingredient to use. In contrast, for the water, I used the carefully formatted italic word "about". You may be wondering: "what gives?"
If that's the case, then thank you for reading carefully!
See, I can't tell you with exacting precision how much water to use because that's a moving target. One day, you may need 137g, and a week later, you could need 165g. This one is more of a "feel" type of thing. This variance occurs because flour is sensitive to atmospheric changes. If it's humid where you're at, the flour actually absorbs a small amount of water from the air, and therefore you will need slightly less for everything to come together. The opposite is true as well. Don't over think it though... Just add enough water that the dough comes together and there is no dry flour sitting around in the bowl. To be on the safe side, start with about 120g, mix thoroughly, and add water a little at a time until you run out of loose flour.
 |
| When it looks something like this, you're set. |
 |
| Pictured: double batch after rising |
The next day, when you're ready to get down to business and eat some pizza, just plop the ball of dough out of the bowl and on to a well floured surface. I'll say again a well floured surface. This dough is very loose and quite sticky.
Once it's sorta round, set it into your olive-oiled cast iron skilled and let it sit (again, covered in plastic wrap) for 2 hours at room temp in the skillet.
After an hour and fifteen minutes or so, start your oven preheating. I like to run mine at hot as it'll go (which for me is 550 degrees).
When the full two hours are up, use your fingertips to gently "dock" the dough. You want to pop any large bubbles that are visible in the crust. If you don't, when it expands in the oven you'll end up with those giant bubbles that rise up, letting all the cheese and sauce run off them and then burning... Not desirable.
Now for everyone's favorite part... Toppings.
Start with a generous layer of sauce. This is a hearty, sort of spongy crust. It can take a lot of sauce (unlike a typical tossed crust where you want a thin layer). This next string of photos shows my typical pie getting all dressed up for a trip to the hot box.
Ok, now stop drooling. We're on the last step.
Take this masterpiece, and throw it in that rippin' hot oven for about 8-12 minutes.
The bottom crust will gently fry in the oil lining the pan. The cheese will melt, ooze down the sides, and get crispy and delicious against the hot iron. The top will brown slightly and get a little bubbly... Probably. If it doesn't kick on the broiler for a few minutes at the end, but watch it closely if you do... There's only about 30 seconds between "brown, bubbly and delicious" and "charred carbon from hades", and a pizza is a terrible thing to waste.
When the pizza is finished cooking, take it out of the oven and lift a bit of the crust off the bottom of the pan. If it's a nice golden brown, grab a spatula then (wearing your bestest oven mitt(s)) lift the pan next to your peel (or cutting board) tilt the pan slightly, and use the spatula to slide the pizza onto your cutting surface.
Let it sit a few minutes before cutting so the cheese can set up a bit.
If the bottom isn't as dark as you'd like it, you can put the pan over a regular stove burner for a few minutes at a time until it darkens up a bit.
Here's the full recipe!
Adapted from the "slice" blog
For one 10'' (12'') pizza:
200g (288g) bread flour
5g (7g) kosher salt
2g (3g) instant yeast
4g (6g) good quality olive oil
~130g (187g) filtered water
Toppings of your choice
Instructions:
Once it's sorta round, set it into your olive-oiled cast iron skilled and let it sit (again, covered in plastic wrap) for 2 hours at room temp in the skillet.
 |
| Mmmmmmm... Bubbly. |
When the full two hours are up, use your fingertips to gently "dock" the dough. You want to pop any large bubbles that are visible in the crust. If you don't, when it expands in the oven you'll end up with those giant bubbles that rise up, letting all the cheese and sauce run off them and then burning... Not desirable.
Now for everyone's favorite part... Toppings.
Start with a generous layer of sauce. This is a hearty, sort of spongy crust. It can take a lot of sauce (unlike a typical tossed crust where you want a thin layer). This next string of photos shows my typical pie getting all dressed up for a trip to the hot box.
 |
| Sauce - leave a little border around the outside unsauced. |
 |
| Cheese - right up to the edges please! it melts, oozes down the sides, and gets crispy. |
 |
| Pepperoni. Plenty of it. |
 |
| Hot Italian sausage. Partially cook the sausages whole, cut them up, finish cooking the rounds. I keep a bunch of them in my freezer. |
 |
| Onion. If you're into that. I am. |
 |
| MOAR CHEESE PLZ |
Ok, now stop drooling. We're on the last step.
Take this masterpiece, and throw it in that rippin' hot oven for about 8-12 minutes.
The bottom crust will gently fry in the oil lining the pan. The cheese will melt, ooze down the sides, and get crispy and delicious against the hot iron. The top will brown slightly and get a little bubbly... Probably. If it doesn't kick on the broiler for a few minutes at the end, but watch it closely if you do... There's only about 30 seconds between "brown, bubbly and delicious" and "charred carbon from hades", and a pizza is a terrible thing to waste.
When the pizza is finished cooking, take it out of the oven and lift a bit of the crust off the bottom of the pan. If it's a nice golden brown, grab a spatula then (wearing your bestest oven mitt(s)) lift the pan next to your peel (or cutting board) tilt the pan slightly, and use the spatula to slide the pizza onto your cutting surface.
Let it sit a few minutes before cutting so the cheese can set up a bit.
If the bottom isn't as dark as you'd like it, you can put the pan over a regular stove burner for a few minutes at a time until it darkens up a bit.
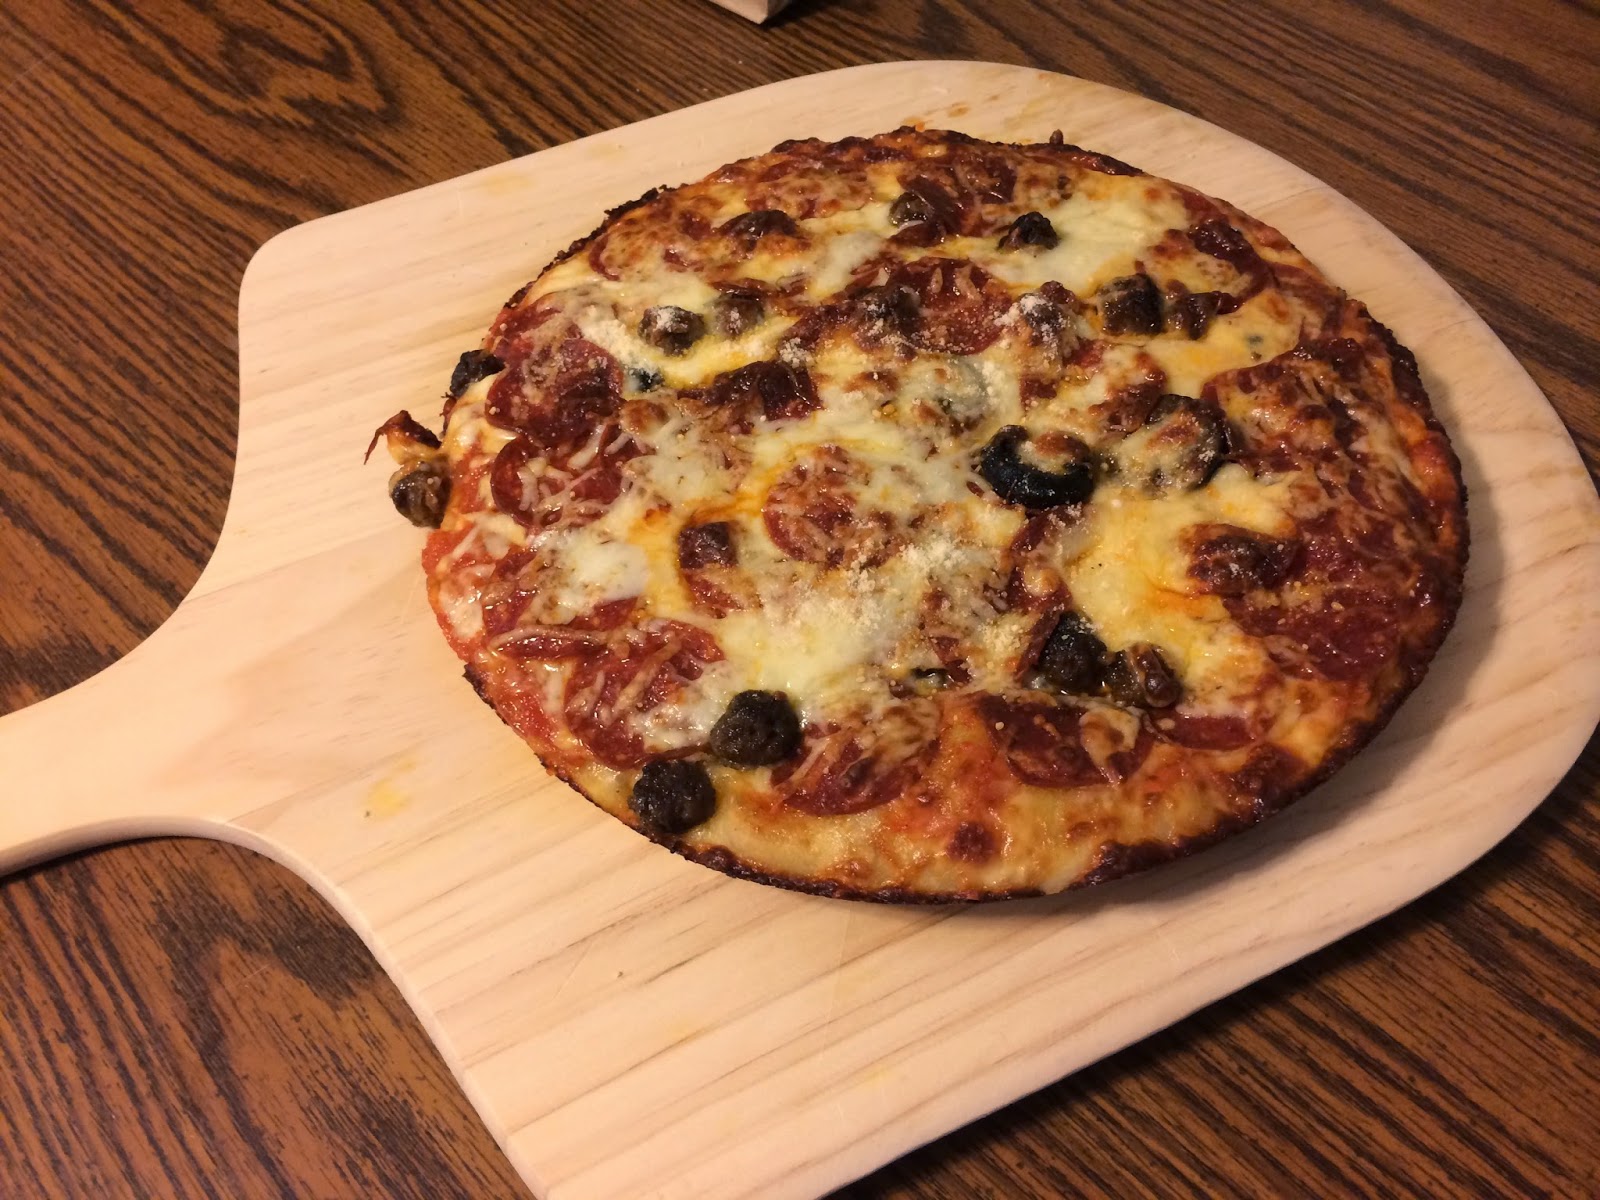
 |
| You know what comes next... |
Here's the full recipe!
Adapted from the "slice" blog
For one 10'' (12'') pizza:
200g (288g) bread flour
5g (7g) kosher salt
2g (3g) instant yeast
4g (6g) good quality olive oil
~130g (187g) filtered water
Toppings of your choice
Instructions:
- Mix the first four ingredients in a bowl, then add water slowly until the dough comes together in a loose ball and there is no dry flour in the bowl
- Cover tightly with plastic wrap (leave room for rising) and let sit at room temperature for 8-24 hours.
- Remove dough to floured surface and work into a ball
- Transfer to oiled cast iron pan and let sit, covered, for two hours.
- Preheat oven to highest temperature (at least 450F) for last hour of step 4.
- Use your fingertips to spread the dough on the bottom of the pan, and pop any large bubbles in the crust.
- Top pizza as desired. Make sure the cheese goes right up to the edges.
- Bake for 8-12 minutes or until toppings are properly cooked and cheese is melted and slightly browned.
- If desired, further crisp the bottom crust over a regular stove burner until desired doneness.
No comments:
Post a Comment